Converting website visitors into leads requires understanding exactly how people move through your funnel—which pages they visit, which CTAs they click, where they drop off, and what ultimately drives conversions. Without proper tracking, you're flying blind, making optimization decisions based on guesses rather than data.
Google Tag Manager (GTM) and Google Analytics 4 (GA4) create a powerful tracking stack for Webflow sites, allowing you to monitor every step of your lead funnel without touching code for each new event. This combination provides granular insights into user behavior, conversion paths, and funnel performance that inform optimization decisions.
This comprehensive guide covers everything you need to build complete lead funnel tracking on Webflow using GTM and GA4. From initial setup to advanced event blueprints, you'll learn how to capture critical conversion data, build actionable reports, and continuously optimize your funnel based on real user behavior.
Understanding the Funnel Tracking Stack
Google Tag Manager is a tag management system that acts as a container for all your marketing and analytics tags. Instead of manually adding tracking codes throughout your Webflow site, you install GTM once and manage all tags through a visual interface.
GTM's power lies in separation of concerns: marketers can deploy tracking without developer help, reducing bottlenecks and enabling rapid iteration. It supports custom JavaScript, third-party pixels (Facebook, LinkedIn, etc.), and sophisticated trigger logic for precise event tracking.
Google Analytics 4 represents a fundamental shift from the previous Universal Analytics model. GA4 uses an event-based architecture where every interaction is an event—page views, clicks, form submissions, scroll depth, everything. This provides unprecedented flexibility in tracking custom user journeys.
"The combination of GTM and GA4 transformed our ability to understand user behavior. We went from guessing about funnel performance to having precise data on every conversion step." — SaaS marketing director
How they work together: GTM acts as the deployment mechanism for GA4 events. You define what to track in GTM (through triggers and tags), and GTM sends that data to GA4 for analysis and reporting. This architecture allows non-technical teams to implement sophisticated tracking without code changes to the Webflow site itself.
Benefits over traditional analytics:
- Track custom interactions specific to your funnel
- No code changes for new tracking requirements
- Unified view across multiple data sources
- Deeper insights into user behavior
- Better attribution and conversion path analysis
The investment in proper setup pays dividends through better optimization decisions backed by concrete data rather than assumptions about how users behave.
Setting Up GTM on Webflow
Implementing Google Tag Manager on Webflow is straightforward but requires attention to detail to ensure proper functionality.
Step 1: Create GTM Account and Container
Navigate to tagmanager.google.com and create a free account. Within the account, create a "Container" for your Webflow site—this is the organizational unit that holds all your tags, triggers, and variables.
When creating the container, select "Web" as the platform. Google assigns a unique container ID in the format GTM-XXXXXXX that you'll need for installation.
Step 2: Install GTM Code on Webflow
GTM provides two code snippets:
- Header code (goes in
<head>) - Body code (goes immediately after opening
<body>tag)
In Webflow, navigate to Project Settings → Custom Code. Paste the header snippet in the "Head Code" section. For the body snippet, you'll need to use Webflow's "Footer Code" section with a note that it should ideally be in the body opening tag (this slight non-standard placement still works for most tracking).
Alternative approach: For better compliance with GTM's recommended placement, add the body code to the opening of the <body> tag in your Page Settings → Custom Code for each page, or use a global embed component on all pages.
Step 3: Configure Basic Tags
Start with the GA4 Configuration Tag:
- In GTM, click "New Tag"
- Select "Google Analytics: GA4 Configuration"
- Enter your GA4 Measurement ID (from GA4 property)
- Set trigger to "All Pages"
- Save and name it clearly (e.g., "GA4 Config - All Pages")
Step 4: Testing Implementation
Use GTM's Preview Mode to verify installation before publishing:
- Click "Preview" in GTM workspace
- Enter your Webflow site URL
- GTM Tag Assistant opens showing fired tags
- Navigate your site and verify tags fire correctly
- Check for errors or warnings
Common setup mistakes to avoid:
- Installing only the header code without the body code
- Not using Preview Mode before publishing
- Creating duplicate GA4 config tags
- Forgetting to publish after creating tags
- Not setting up proper trigger conditions
Pro tip: Always work in GTM "Workspaces" and "Versions" so you can revert changes if something breaks.
GA4 Configuration for Lead Funnels
Once GTM is installed, configuring GA4 properly ensures you capture the right data in the right format for funnel analysis.
Creating Your GA4 Property
In analytics.google.com, create a new GA4 property. Unlike Universal Analytics, GA4 doesn't require views—you configure everything at the property level. During setup, enable enhanced measurement for automatic tracking of:
- Scrolls (90% depth)
- Outbound clicks
- Site search
- Video engagement
- File downloads
These automatic events provide baseline data without manual configuration, though you'll add custom events for funnel-specific tracking.
Connecting GTM to GA4
Link your GA4 property to GTM through the Measurement ID (format: G-XXXXXXXXXX). Find this in GA4 under Admin → Data Streams → [Your Stream] → Measurement ID.
In GTM, create a GA4 Configuration Tag with this Measurement ID and set it to fire on all pages. This establishes the connection and enables event tracking.
Setting Up Conversions
GA4 requires you to mark events as conversions for proper tracking:
- Navigate to Admin → Events in GA4
- Find your conversion events (we'll create these next)
- Toggle "Mark as conversion"
- Events marked as conversions appear in conversion reports
Custom Dimensions for Webflow
Create custom dimensions to capture Webflow-specific data:
- User type: First-time vs returning visitors
- CMS category: For blog or product categorization
- Lead source: Where leads originated
- Funnel stage: Current position in journey
- Form type: Contact, demo, download, etc.
Navigate to Admin → Custom Definitions and create these dimensions with appropriate scopes (event or user level).
User Properties Configuration
User properties track attributes about users across sessions:
- Company size (if captured)
- Industry vertical
- Engagement level (based on behavior)
- Lead score (calculated from actions)
These properties enable advanced segmentation in reports, showing how different user types move through your funnel differently.
Essential Events Blueprint
This section provides ready-to-implement events for comprehensive lead funnel tracking on Webflow sites.
Funnel Stage Events
1. Enhanced Page View Tracking
While GA4 tracks page views automatically, enhanced page views capture additional context:
GTM Setup:
- Trigger: All Pages (Page View)
- Tag: GA4 Event
- Event Name:
page_view_enhanced - Parameters:
page_category: Use Webflow CMS category fieldfunnel_stage: Top, Middle, Bottom of funnelcontent_type: Blog, Landing Page, Product, etc.
This provides richer context than default page views for funnel analysis.
2. Section Engagement Tracking
Track when users engage with specific sections (pricing, features, testimonials):
GTM Setup:
- Trigger: Element Visibility (50% of section visible for 2 seconds)
- Tag: GA4 Event
- Event Name:
section_view - Parameters:
section_name: {{Element ID}} or custom variablepage_location: {{Page Path}}
Implementation tip: Add unique IDs or classes to important sections in Webflow for precise targeting.
3. CTA Click Tracking
Every call-to-action click should be tracked to understand what drives conversions:
GTM Setup:
- Trigger: Click - Just Links (filter for CTA classes/IDs)
- Tag: GA4 Event
- Event Name:
cta_click - Parameters:
cta_text: {{Click Text}}cta_location: Header, Hero, Mid-page, Footercta_type: Primary, Secondarydestination_url: {{Click URL}}
Webflow tip: Use consistent class names for CTAs (e.g., .cta-primary, .cta-secondary) to simplify trigger setup.
4. Form Interaction Events
Track form engagement before submission to understand drop-off:
GTM Setup:
- Trigger: Form Start Trigger (user clicks into first field)
- Tag: GA4 Event
- Event Name:
form_start - Parameters:
form_name: Contact, Demo Request, Newsletterform_location: {{Page Path}}
Lead Capture Events
1. Form Submission Tracking
The most critical conversion event for lead funnels:
GTM Setup:
- Trigger: Form Submission (Webflow success state)
- Tag: GA4 Event
- Event Name:
form_submit - Parameters:
form_name: Specific form identifierform_location: Which pagelead_type: Demo, Contact, Download
Webflow implementation: Use Webflow's success state or redirect to thank-you page as trigger condition. For success state, create a custom JavaScript trigger that detects the .w-form-done class.
Mark this as conversion in GA4 for funnel reporting.
2. Email Signup Events
Newsletter and email capture tracking:
GTM Setup:
- Trigger: Form submit for email forms
- Tag: GA4 Event
- Event Name:
email_signup - Parameters:
signup_location: Footer, Popup, Inlinecontent_type: Newsletter, Resources, Updates
3. Download Trigger Events
Track content downloads (PDFs, guides, resources):
GTM Setup:
- Trigger: Click - Just Links (filter for .pdf, /download/ URLs)
- Tag: GA4 Event
- Event Name:
file_download - Parameters:
file_name: {{Click URL}} or custom extractionfile_type: PDF, DOCX, etc.download_location: Which page or section
4. Demo Request Events
High-intent conversion tracking:
GTM Setup:
- Trigger: Demo form submission
- Tag: GA4 Event
- Event Name:
demo_request - Parameters:
demo_type: Live, Video, Trialcompany_size: If captured in formurgency: If timeline captured
Engagement Events
1. Scroll Depth Tracking
Understand how far users read your content:
GTM Setup:
- Trigger: Scroll Depth (25%, 50%, 75%, 90%)
- Tag: GA4 Event
- Event Name:
scroll - Parameters:
scroll_depth: {{Scroll Depth Threshold}}page_location: {{Page Path}}
Enable this selectively on important pages (landing pages, long-form content) to avoid data bloat.
2. Video Play Tracking
If using embedded videos in your funnel:
GTM Setup:
- Trigger: Video triggers (YouTube or Vimeo)
- Tag: GA4 Event
- Event Name:
video_play,video_progress,video_complete - Parameters:
video_title: Video namevideo_percent: Progress milestonevideo_provider: YouTube, Vimeo, etc.
3. Content Engagement
Track quality engagement signals:
GTM Setup:
- Trigger: Timer (user on page 30+ seconds)
- Tag: GA4 Event
- Event Name:
engaged_session - Parameters:
engagement_time: Time thresholdpage_category: Content type
This helps distinguish genuine interest from bounce traffic.
E-commerce Events (If Applicable)
For Webflow E-commerce sites, implement enhanced e-commerce tracking:
Key events:
add_to_cart: Product added to cartbegin_checkout: Checkout process startedadd_payment_info: Payment method selectedpurchase: Transaction completed
Each event includes detailed product data (ID, name, category, price, quantity) for revenue analysis and product performance insights.
Building Custom Triggers in GTM
Triggers determine when tags fire, making them critical for precise event tracking.
Click Triggers for CTAs
Create triggers that fire on specific button clicks:
- Choose "Click - All Elements" or "Click - Just Links"
- Set conditions: Click Classes contains "cta-button"
- Or use Click Text equals specific button text
- Add page path filtering if needed for specific pages
Form Submission Triggers
Webflow forms have unique success states requiring custom trigger logic:
Method 1: Success State Detection
javascript
// Custom JavaScript trigger
function() {
  return document.querySelector('.w-form-done') !== null;
}
Method 2: Thank You PageUse Page View trigger filtered to thank-you page URL.
Scroll Depth Triggers
Built-in GTM scroll depth triggers:
- Select "Scroll Depth" trigger type
- Choose percentages (10%, 25%, 50%, 75%, 90%)
- Select "Horizontal" or "Vertical" scrolling
- Optionally limit to specific pages
Custom JavaScript Triggers
For advanced scenarios not covered by built-in triggers:
Example: Detect when user selects pricing tier
javascript
function() {
  var tierButtons = document.querySelectorAll('.pricing-tier-select');
  for (var i = 0; i < tierButtons.length; i++) {
    tierButtons[i].addEventListener('click', function() {
      return true;
    });
  }
}
Visibility Triggers
Track when important elements come into view:
- Choose "Element Visibility" trigger
- Set CSS selector for target element
- Configure visibility threshold (50%, 100%)
- Add time requirement (visible for 2 seconds)
This is perfect for tracking engagement with key content sections or conversion elements.
Creating Reports & Visualizations
Raw event data means nothing without actionable reports that reveal funnel performance and optimization opportunities.
GA4 Funnel Exploration
Build custom funnels in Explore → Funnel Exploration:
- Define funnel steps using your custom events
- Add:
page_view(landing) →form_start→form_submit - View drop-off rates between each step
- Segment by traffic source, device, user properties
- Identify where users abandon the funnel
This visualization shows exactly where optimization efforts should focus.
Custom Dashboards
Create dashboards in Looker Studio (formerly Data Studio):
- Connect GA4 as data source
- Build cards for key metrics (conversion rate, form submissions, engagement)
- Add time-series charts showing trends
- Include funnel visualization
- Segment by traffic source and campaign
Conversion Path Analysis
Use GA4's path exploration to understand:
- Common paths to conversion
- Pages visited before converting
- Drop-off points in unexpected journeys
- Content that assists conversions
Navigate to Explore → Path Exploration and set ending point as conversion event.
Attribution Modeling
GA4's data-driven attribution shows which touchpoints deserve conversion credit:
- Navigate to Advertising → Attribution
- Compare attribution models
- Understand multi-touch conversion paths
- Allocate marketing budget based on actual contribution
Optimization Based on Data
Tracking means nothing without action on insights discovered through funnel analysis.
Identifying Drop-Off Points
Analyze funnel reports to find where users abandon the journey:
- High drop-off between page view and CTA click → CTA visibility or messaging issue
- Drop-off between form start and submit → Form too long, unclear value prop
- Low conversion from specific traffic sources → Targeting or landing page mismatch
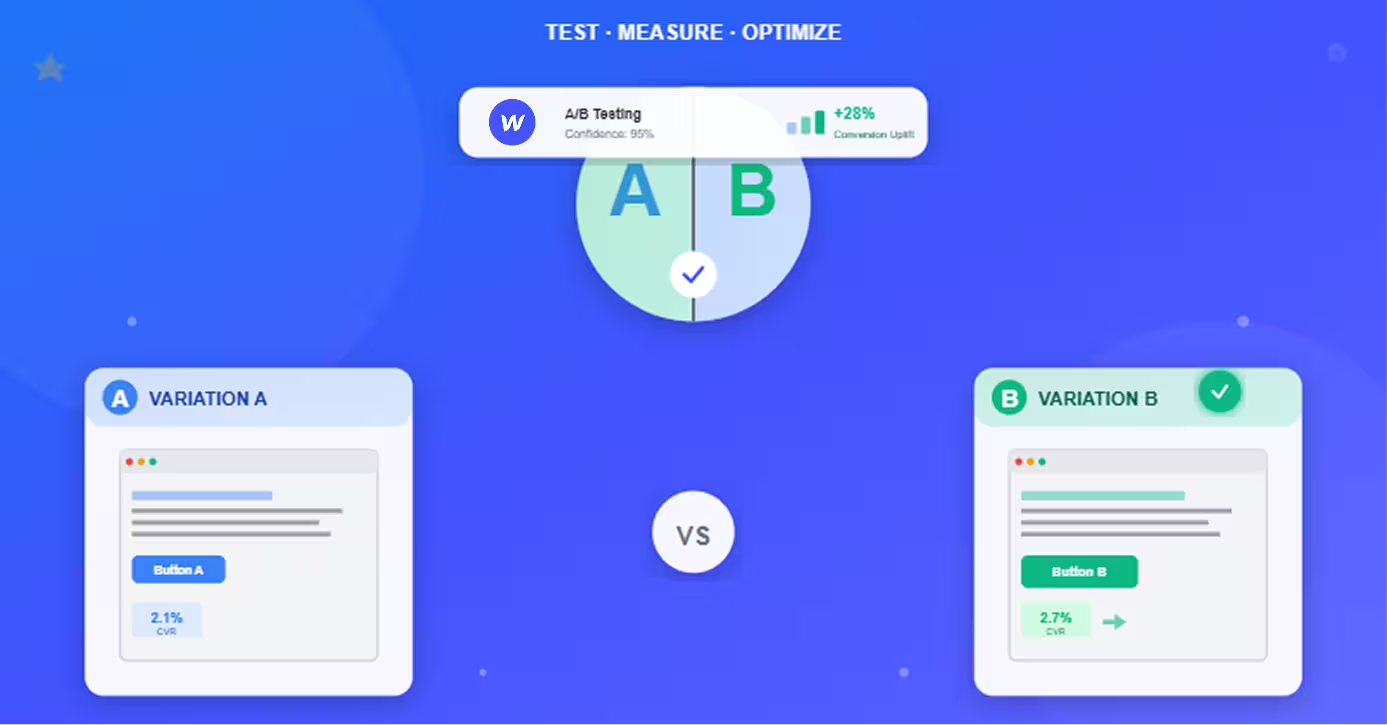
A/B Testing Insights
Use event data to inform and validate A/B tests:
- Test different CTA copy and track click rates
- Compare form lengths through completion rates
- Experiment with page layouts and measure engagement
- Validate changes through statistical significance
Improving Conversion Rates
Apply data-driven optimizations:
- Add CTAs where engagement is high but clicks are low
- Shorten forms with high drop-off rates
- Improve mobile experience if device data shows poor mobile conversion
- Add social proof near conversion points with high abandonment
Iterative Optimization
Optimization is continuous, not one-time:
- Analyze current funnel performance
- Identify biggest opportunity (highest impact/effort ratio)
- Implement change
- Monitor impact for 2-4 weeks
- Keep winners, revert losers
- Repeat
This systematic approach compounds improvements over time, gradually increasing conversion rates through evidence-based changes.
Conclusion
Building comprehensive funnel tracking with GTM and GA4 on Webflow transforms marketing from guesswork to science. You gain visibility into every step of the user journey, understand what drives conversions, and make optimization decisions backed by real user behavior data.
The initial setup investment—installing GTM, configuring GA4, and implementing event tracking—pays dividends through better conversion rates and more efficient marketing spend. Every optimization decision becomes easier when you can see exactly how users behave and where improvements will have the greatest impact.
Start with core events (page views, CTA clicks, form submissions) and expand tracking as you identify additional insights needed. Don't try to track everything at once—focus on events that directly inform optimization decisions for your specific funnel.
The beauty of this GTM + GA4 stack is flexibility without code changes. As your funnel evolves, you can add new tracking, modify existing events, and create new reports entirely through GTM and GA4 interfaces—no Webflow updates required.
Frequently Asked Questions
Do I need coding knowledge to set up GTM and GA4 on Webflow?
Basic GTM and GA4 setup requires minimal coding—just copy-pasting provided snippets into Webflow's custom code areas. Most event tracking uses GTM's visual interface with no coding required. However, advanced custom events may need simple JavaScript triggers. Many tutorials and templates exist for common tracking scenarios, making implementation accessible even for non-technical marketers.
Will GTM slow down my Webflow site?
GTM adds minimal performance impact when implemented correctly. The container itself is small (~30KB), and tags load asynchronously without blocking page render. However, adding too many third-party tags (Facebook Pixel, LinkedIn Insight, etc.) can accumulate overhead. Monitor page speed with Google PageSpeed Insights and limit tags to essential tracking only. Use tag sequencing and firing priorities to optimize load order.
How do I track Webflow form submissions in GTM?
Webflow form tracking requires detecting the success state. Method 1: Create a custom JavaScript trigger that detects when .w-form-done class appears. Method 2: Redirect successful submissions to a thank-you page and trigger on that page view. Method 3: Use Webflow's form redirect feature to a tracking page. The success state detection method is most elegant but requires basic JavaScript trigger setup in GTM.
What events should I track first for lead funnels?
Start with core conversion events: form submissions (mark as conversion in GA4), CTA clicks on primary buttons, and page views of key funnel pages (landing, pricing, demo pages). Add form start events to measure drop-off. These fundamentals provide immediate insights into funnel performance. Expand to engagement events (scroll depth, video plays) and micro-conversions (email signups, downloads) as you optimize based on initial data.
Can I track conversions across multiple Webflow sites in one GA4 property?
Yes, you can use one GA4 property for multiple Webflow sites by adding the same GA4 Measurement ID across sites. Create a custom dimension for "site_name" to segment data. However, for significant traffic or different business units, separate properties provide clearer reporting. Consider using GA4's roll-up property feature to consolidate data from multiple properties into a single overview while maintaining separate detailed analytics per site.